Review - Olympus OMD EM1 - MKII - 2018

Visitors
Since - 3rd September, 2018
Share this Post
Olympus – OMD EM1 – MKII – Review
Introduction
With rumours of a new Olympus Flagship on the horizon I felt it was time to update to the current flagship model and put it through it’s paces to see for myself if the hype concerning the performance and image quality of the Olympus OM-D EM1 – MKII were truly justified.
The OM-D EM1 – MKII is a Micro Four Thirds Format camera from Olympus sporting a new 20 Mega Pixel Live-MOS sensor, two SD memory card slots, a larger battery for extended shooting time, full button customisation for nearly every shooting parameter possibly conceivable and rivals some of the highest end full frame DSLR cameras on the market, and both mechanical and electronic shutter capabilities.
The camera is aimed at high end prosumer and professional photographers looking to reduce the size and weight of their gear in the field with minimal impact on image quality.
With the camera currently retailing for around the Au$2800.00 mark I was extremely fortunate to pick up a sample on special from Ryda.com in Sydney for Au$1998.95. This camera was guaranteed to me by Olympus Australia as being genuine Australian stock with the full 2 Year Warranty backing of Olympus Australia and not a grey import
Lets take a closer look at this beast.
First Impressions
My first impressions are a blistering fast AI. This camera has an amazingly fast autofocus system. I think the only shots that haven’t been in focus out of the few hundred images I’ve take so far occurred when accidentally touching the shutter button when the camera was slung over my shoulder or around my neck.
Even on inspection of these photos back in the lab the pavement or my feet or something untoward was in the field of view.
Having said that, most of these mishaps were in focus as well. The few that were out of focus I suspect were objects that were too close for the lenses physical focusing capabilities. Not much you can do when Physics gets in the way unfortunately.
I’ll continue this review shortly as I work through the new features this camera has to offer and upload my finding as I go along.
In the meantime I’ve added a few sample images below from my experience with this new piece of hardware.
Please remember to like our Facebook page or leave a comment if you find this review helpful.
Cheers
The Team @ Platypus Paparazzi Photography – 3rd September – 2018
Image Testing – Default Camera Setting Vs In Camera Editing
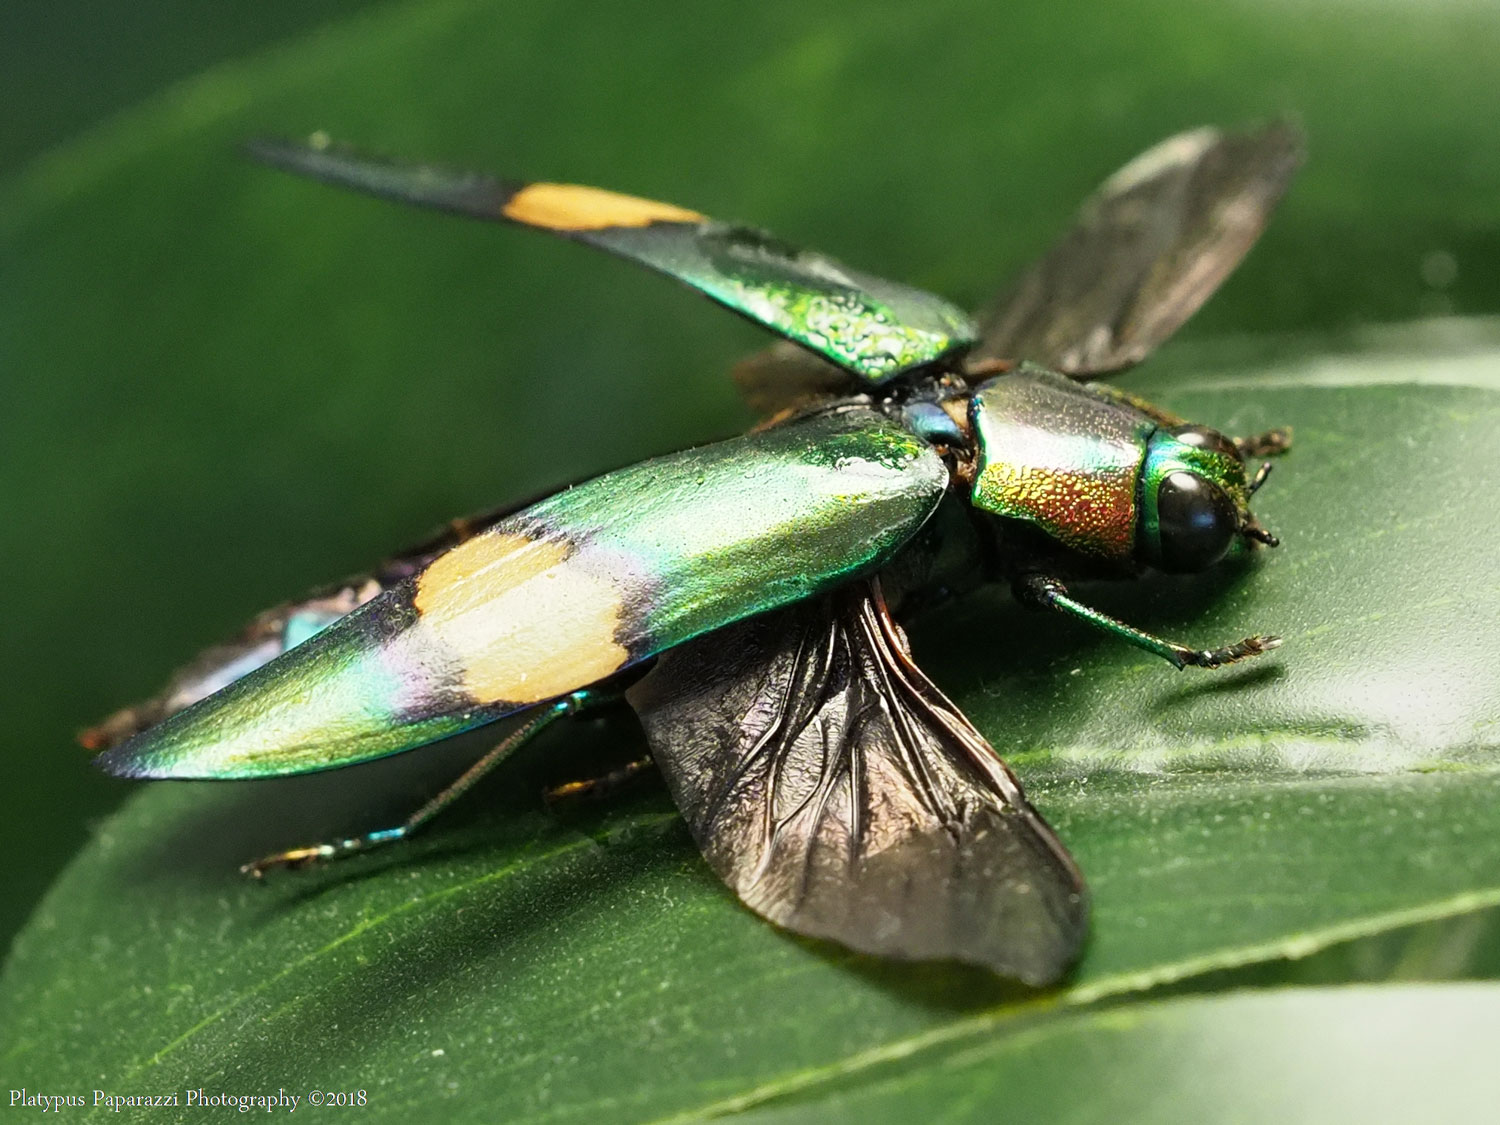
Fig 1 : Default Camera JPEG settings.
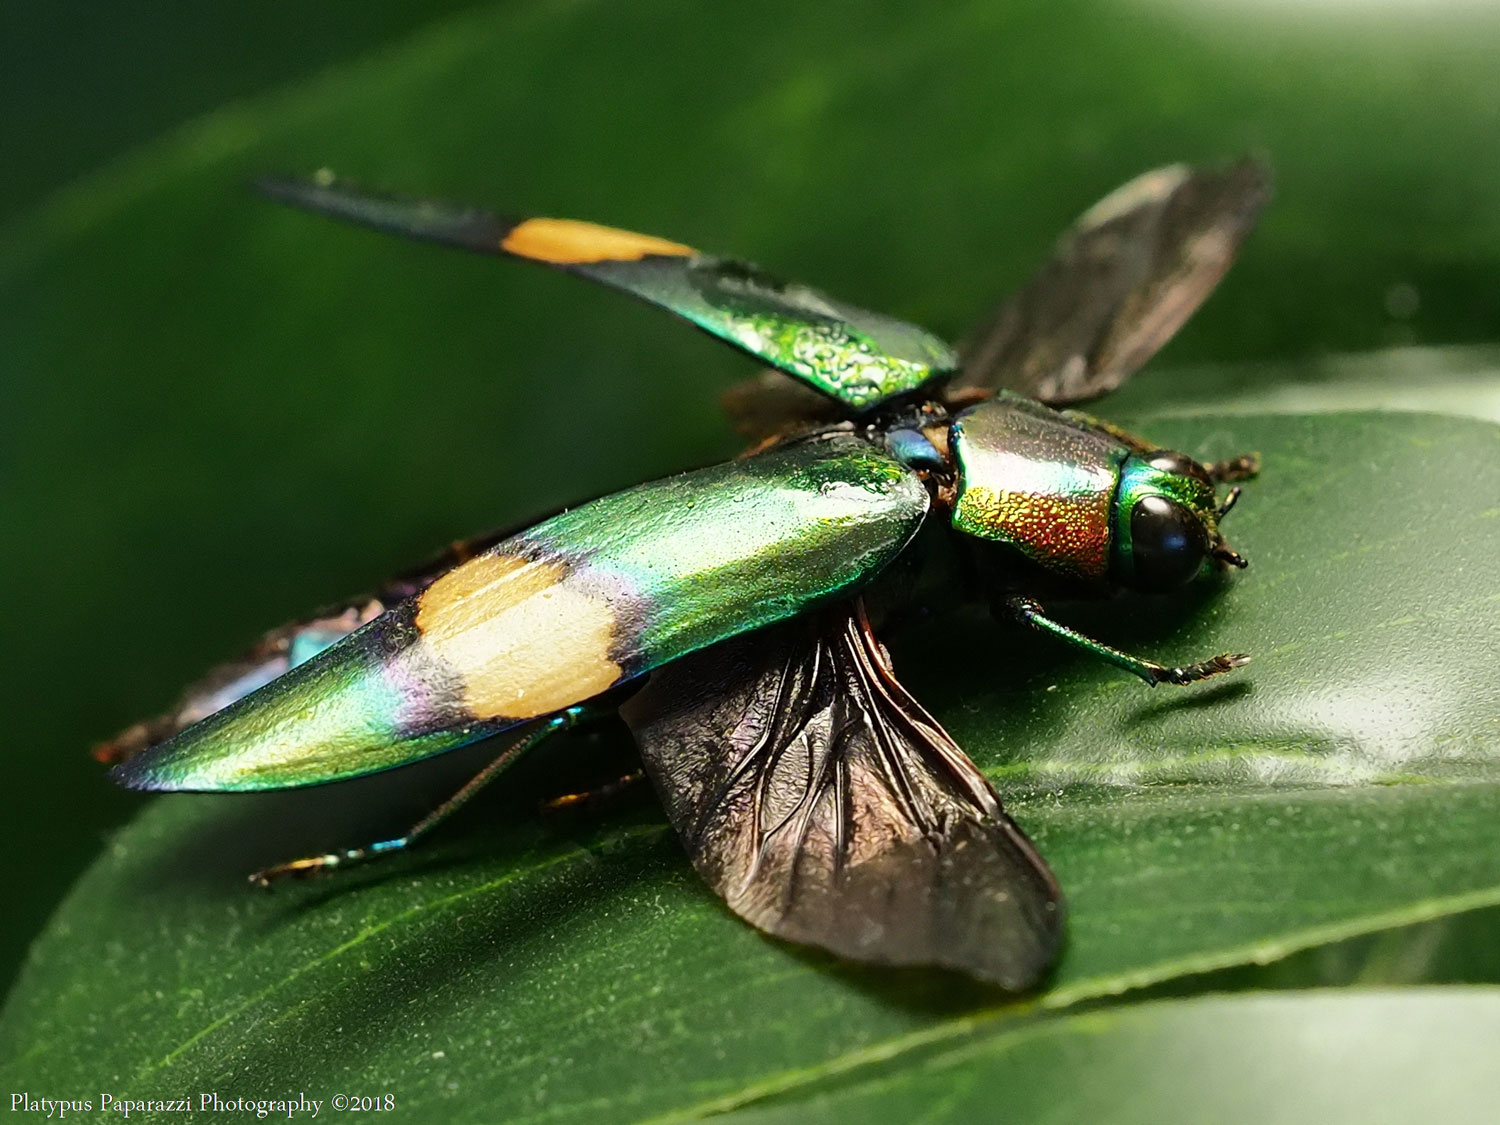
Fig 2 : In Camera JPEG Editing applied.
The images above were taken at the Olympus display and testing Centre in Macquarie Park in Sydney. They represent the difference between the Default camera settings Natural with no sharpening or contrasting applied vs the Cameras in house JPEG editing functions. The image in Figure 1 was taken with the EM1 MKII default camera setting while the image on the right (Figure 2) has been enhanced with level 1 noise reduction, +1 Sharpening and vivid settings applied. The difference between the two images is quite stark with a real world improvement in sharpening being evident. The lighting was consistent at the Olympus Australias Testing Centre which provided excellent conditions for the comparative test.
Manual Mode Settings – Bright Sunshine :
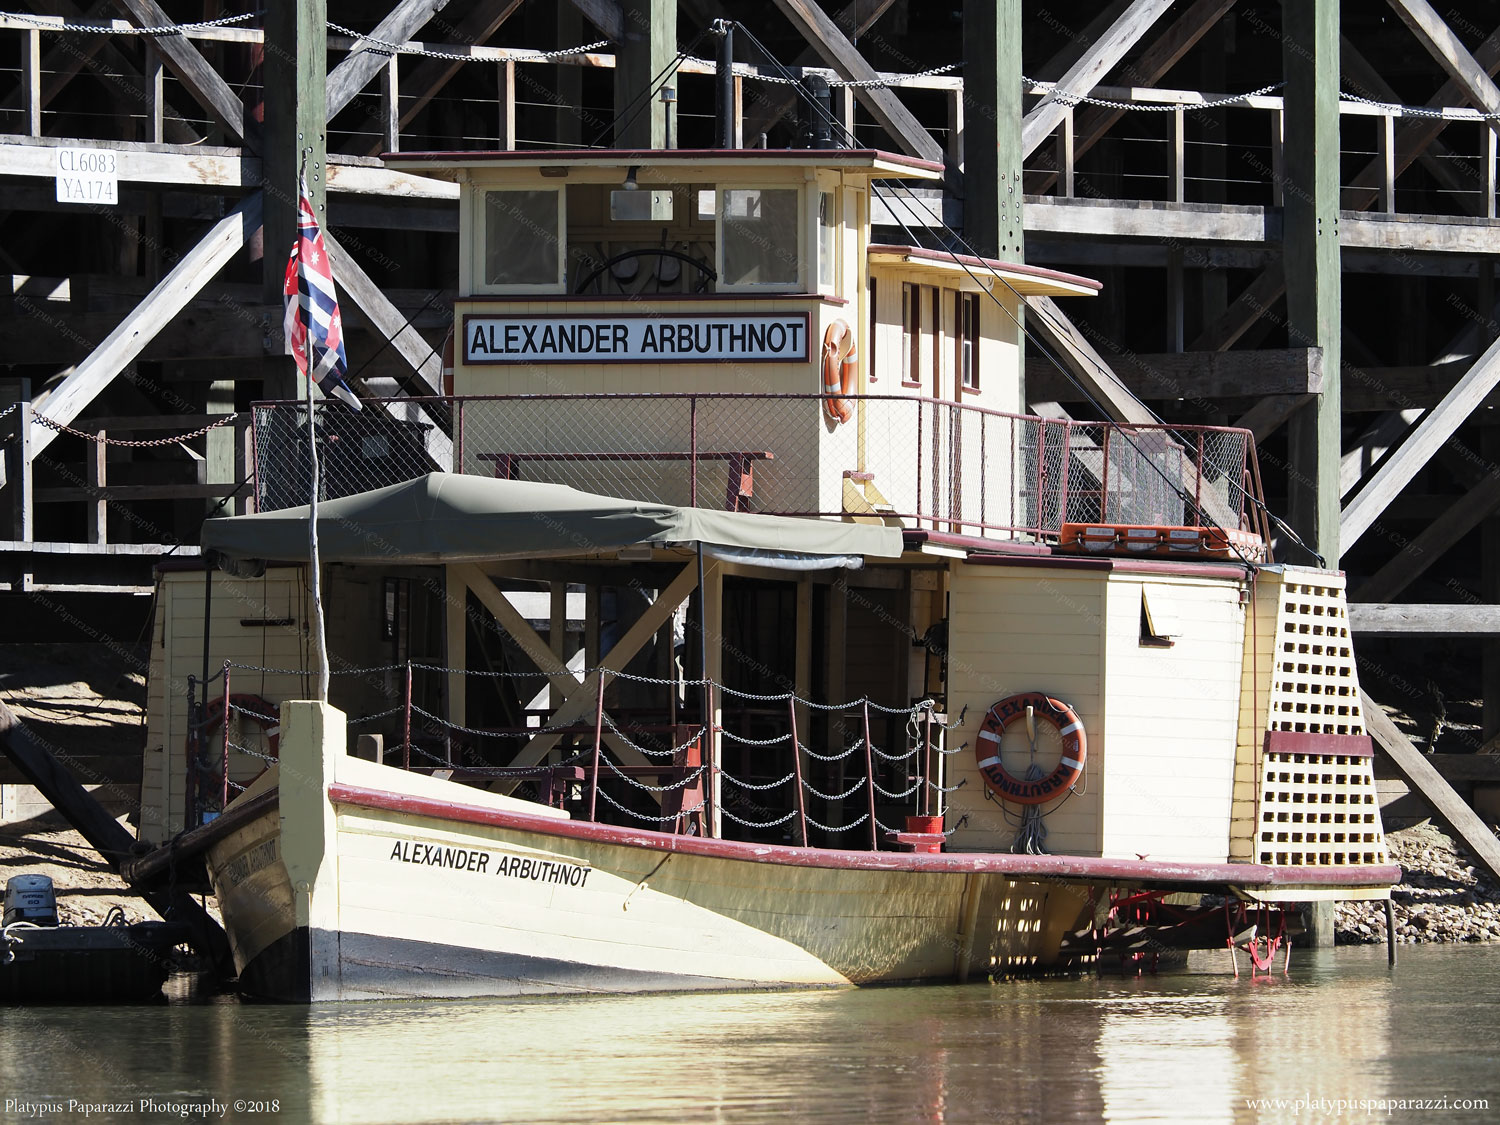
The two images (Figures 3 and 4) below were taken in the Historic Paddle Steamer town of Echuca, Victoria along the Murray River on a beautiful crystal clear Sunny Day with light streaming onto these two Heritage Listed buildings. With the 12-40mm Pro Zuiko Zoom set to it’s sweet spot of an f4 aperture the clarity and true elegance of the new EM1 MKII 20 Megapixel sensor becomes apparent. These are also the default camera JPEG output Natural, with no additional sharpening or contrast applied.

Figure 3. Settings : MANUAL MODE – (Lens : 12-40mm Pro Zuiko F2.8) Camera Settings : 12mm, f4, 1/2000, 5300K, ISO 200, Exposure Comp. -0.3EV, Single AF, Centre Weighted.

Figure 4. Settings : MANUAL MODE – (Lens : 12-40mm Pro Zuiko F2.8) Camera Settings : 18mm, f4, 1/2000, 5300K, LOW ISO 80, Exposure Comp. -0.3EV, Single AF, Centre Weighted.
Cropping :
The images below were photographed in exceptionally bright sunshine with the EM1 MKII and the Zuiko 40-150mm f2.8 Pro Zoom with the 1.4 x Tele-converter lens attached. These images give you some indication of the cropping capability of this new 20 Megapixel sensor with minimal image degradation under good lighting conditions.


Some Basic Shadow Testing, Sharpening and Noise Filtering :
The four images below were again taken in the Historic Paddle Steamer town of Echuca, Victoria along the Murray River on a beautiful crystal clear Sunny Day. In these photos however the light was not directly on the building and they were somewhat in partial shadow. With the 12-40mm Pro Zuiko Zoom set to it’s sweet spot of an f4 aperture again, I wanted to compare the clarity of images to those in full light above. Again for the Two images above and below on the left these are also the default camera JPEG output Natural, with no additional sharpening or contrast applied. The two images above and below on the right however have had both in Camera sharpening and noise filtering applied using the RAW Camera Settings in Olympus Viewer Software Version 3.
The two images left and right below the top two have also been cropped about 20-30% and certainly demonstrates the great cropping capability of the 20 Megapixel sensor with minimal loss of detail.

Settings : MANUAL MODE – (Lens : 12-40mm Pro Zuiko F2.8) Camera Settings : 21mm, f4, 1/500, WB Auto, ISO 160, Exposure Comp. -0.3EV, Single AF, Pattern metering mode.

With this image I have applied the same in camera JPEG settings from the camera through the Olympus Viewer Software to enhance the Sharpness +2 and set the Noise Filter to its Highest setting. The difference is plainly obvious, with this second image appearing very sharp by comparison to the one on the left.

This image has been cropped about 25% in a 16:9 ratio format. Camera Settings : MANUAL MODE – (Lens : 12-40mm Pro Zuiko F2.8) Camera Settings : 13mm, f4, 1/640, WB Auto, ISO 160, Exposure Comp. -0.3EV, Single AF, Pattern metering mode.
This image has been cropped about 25% in a 16:9 ratio format and again as the image above has been enhanced with +2 Sharpening and the Highest in Camera Noise Filter applied.
Personal Remarks and Observations :
Having not seriously tested many digital camera systems other than the Olympus Micro Four Thirds series I can only give my opinion of this cameras functions and image quality in relation to other Olympus systems.
Although I feel image quality is improved in this model compared to say my EM5 which I have compiled most of this website with I wouldn’t say it was an enormous leap in image quality per se. The EM5 can produce amazing digital images given the right lighting conditions, as no doubt can many digital cameras on the market.
There is definitely an improvement though in the EM1 MKII. Whether this improvement is a function of the increased pixel density of the sensor I’m not sure but I suspect that is part of the equation.
So long as electronic noise associated with increased temperatures that can arise with a higher sensor pixel density can be somewhat curtailed or at least dealt with in post production it’s logical to assume image quality should be better on the whole. It may also have something to do with the lack of the Optical Low Pass Filter which was present on the EM5 but was not featured on the EM1 MKII sensor.
The four images below are taken with these two cameras respectively. The images below to the right are both from the EM5 MKI. This camera is no slouch, producing high quality sharp images from the 12-40mm and 40-150m Pro Zuiko f2.8 respectively.
The images below left are from the EMI MKII and although the composition and lighting conditions are quite different for the second set of images (with perhaps an additional difference in white balance applied) the EM5 is showing it’s capabilities in the slightly lower light levels. Although it doesn’t quite match the detail from the EMI MKII in the high resolution versions of these shots it can be hard to justify the much heftier price tag of the EMI MKII based on image quality alone.
In the top two images you can also see what I suspect is the darkening affect of the EM5’s optical low pass filter. This filter is effectively what I understand to be a polarising film over the the EM5s digital sensor (Please correct me if I’m wrong here).

Train Carriage – Echuca – Victoria – September 2018 – Olympus OM-D EM1 MkII, Zuiko Pro Zoom 12-40mm – RAW Edit with +2 Sharpening and High Noise Filter applied.
Paddlesteamer – Port of Echuca- Victoria – September 2018 – Olympus OM-D EM1 MkII, Zuiko Pro Zoom 40-150mm (Sharpened +2 and High Noise Filter applied in Olympus Viewer 3)

Train Carriage – Echuca – Victoria – September 2018 – Olympus OM-D EM5 MkI, Zuiko Pro Zoom 12-40mm – RAW Edit with +2 Sharpening and High Noise Filter applied.
Paddle Steamer – Port of Echuca- Victoria – April 2018 – Olympus OM-D EM5 MkI, Zuiko Pro Zoom 40-150mm – This image is edited.
Low Light Performance :
The Olympus OM-D Micro Four Thirds systems do suffer in low light compared to full frame systems and although faster glass and the impressive Olympus 5 axis image stabilising system does compensate for some of this drawback in the system as a whole, whether Micro Four Thirds sensor technology can ever match the same level as full frame format sensors in low light is yet to be seen.
Of course we are really not comparing apples with apples in this scenario and Mico Four Thirds (MFT) has many benefits over full frame which can’t be ignored including the substantial difference in price and physical size of full frame DLSR versus MFT.
The image stabiliser of the EM1 MKII is vastly superior in performance to that of the EM5, and compared to this older model in conjunction with the lack of the Optical Low Pass Filter on it’s sensor increases it’s performance in low light compared to it’s predecessor.
Compared to the EM5 the amount of noise in shots I have taken with the EM1 MKII, and we are talking shadows or very dull lighting conditions here, requiring additional noise reduction is reasonably consistent with older Olympus series Micro Four Thirds I have owned. I think the noise improves a little in the EM1 MKII but it still needs to be cleaned up in post production in my opinion. Usually that just means more work in front of the PC, although the in camera JPEG Noise filter is very efficient and can save alot of time.
I also need to add here that I am a self confessed Pixel Peeper. I am pretty fussy, so crystal clear image quality is a thing with me. If you like the grainier film look to your photos when light conditions are empoverished then perhaps this minor noise level isn’t an issue. For me I prefer the seriously gloss look to my images. Perhaps I’m asking too much from digital sensors generally, but they are expectations that I am sure many consumers out there have of the higher end systems.
Having said that the prints I’ve made from this camera are more than satisfactory and I wouldn’t hesitate to produce professional grade prints from this sensor under good to reasonable lighting conditions, and where lighting is on the lower end of the useable scale most noise can be cleaned up reasonably well in post production with good editing software. Of course there are always acceptable and unacceptable limits.
I’ll add some photographic examples of what I mean shortly. The Sunrise photo in the Samples Section below is a little too grainy for my liking. You might say I’m knit picking with this image, but there’s too much noise in it for my personal taste. This image is however standard in house JPEG camera default settings without Noise filtering or additional sharpening applied, and I assume it will clean up to my taste after that editing is performed.
In great light this camera shines. The crystal clear images produced with crisp contrast and tack sharpness from the Pro Lenses is one of the true spectacles of the Micro Four Thirds System generally making these cameras and lenses a pleasure to shoot with.
Other Considerations :
It really does boil down to personal preference. I have bought into this system with some expensive glass which I love dearly. The AI of this camera is outstanding and the extra 4 Megapixels allows for serious cropping of images with minimal degradation in image quality for those times that composition hasn’t gone to plan.
From a stills photography point of view I think you are buying into this new model for the increased AI, fantastic comfortable ergonomics, an increase in pixel density, an electronic shutter vs a mechanical system alone, the incredible 5 Axis image stabiliser and the addition of Phase detection auto focus, which in other camera systems including the Sony A7R series has demonstrated it’s consistent value in tracking moving targets
As far as 4K video is concerned I haven’t had much experience with these functions so I can’t say for now. I’m sure the addition of great quality video is a huge bonus if you have a regular use for it.
Comparison with other Micro Four Thirds :
Having seen the reviews from professional reviewers such as Gordon Laing at Cameralabs of the Panasonic series cameras such as the G9 I would love to do a comparative test side by side with these two Micro Four Third Camera systems. The image quality in darker lighting scenarios from the G9 looks amazingly crisp for a Micro Four Thirds Sensor. So logically I’m curious as to whether this is in house camera settings like the aggressive sharpening process that Sony systems use, or some other post production magic, but they certainly look different to the Olympus Micro Four Thirds output in my opinion.
Gordon is of course a professional photographer and I am coming from a very amateur perspective, so it could be a lack of skill and knowledge on my part that these differences in image quality arise.
As a consumer being able to test cameras in the field before purchasing would be a great bonus as relying on reviews in the industry is only part of the personal process of buying gear, especially when the price tag is relatively high.
It would also be fantastic if companies such as Olympus and Panasonic who collaborate in the development of their cameras and sensors would offer the same image quality within their range of equipment so purchasing decisions can be based on other factors including ergonomics, personal preference and brand loyalty. The concept of jumping ship over image quality in camera systems really shouldn’t be part of a purchasing equation in my opinion where companies are co-developing technology.
I’ll add more to this review in time. Perhaps I’ll change my mind on some of these points after I’ve had some more experience with this camera. In the meantime I’ll let the images do the talking and let you be the judge. As I said before I am an amateur photographer and a bit of a perfectionist so my expectations maybe somewhat unrealistic.
Cheers
The Team at Platypus Paparazzi Photography – 4th September 2018
Sample Images :

Sunrise Central Coast – NSW – August 2018 – Olympus OM-D EM1 MkII, Zuiko Pro 12-40mm. This image was a handheld shot with All Direction Image Stabilisation applied.
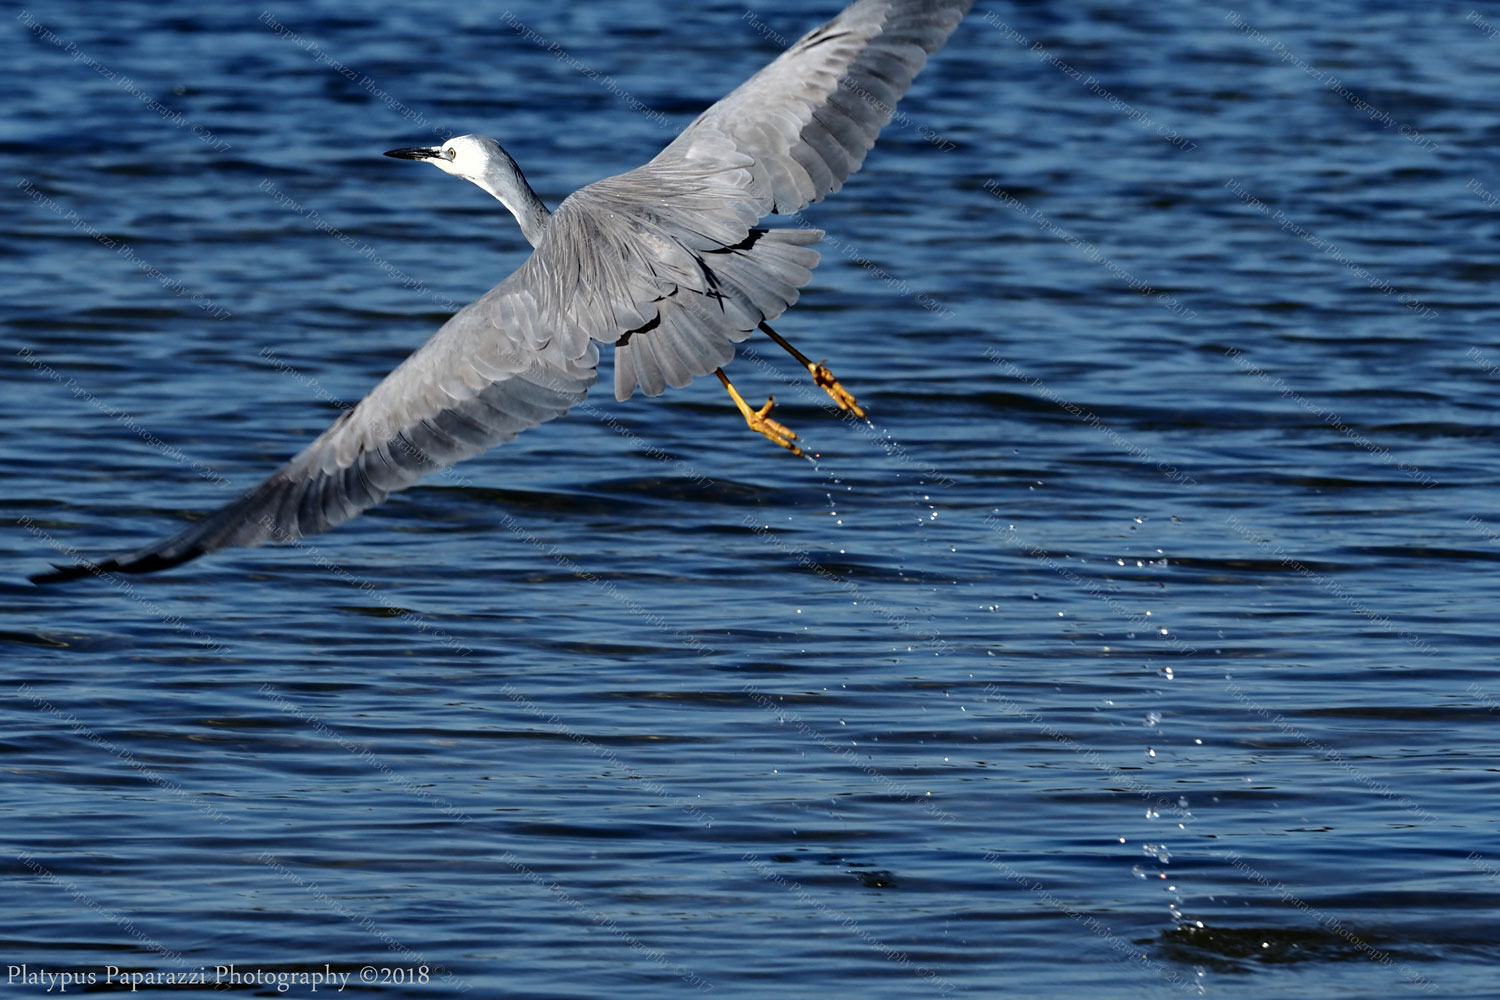
Heron in Flight – Rodd Point – Sydney- NSW – August 2018 – Olympus OM-D EM1 MkII, Zuiko Pro 12-40mm. This image was snapped in haste and was probably not in focus on the main subject at the time the shutter was triggered. I’ve also applied the in camera vivid settings for this image which has provided a very deep contrasting blue of the water in the background. I find the Natural setting with the default JPEG settings on this camera are little washed out, but that may change with a better exposure applied in Manual Mode.
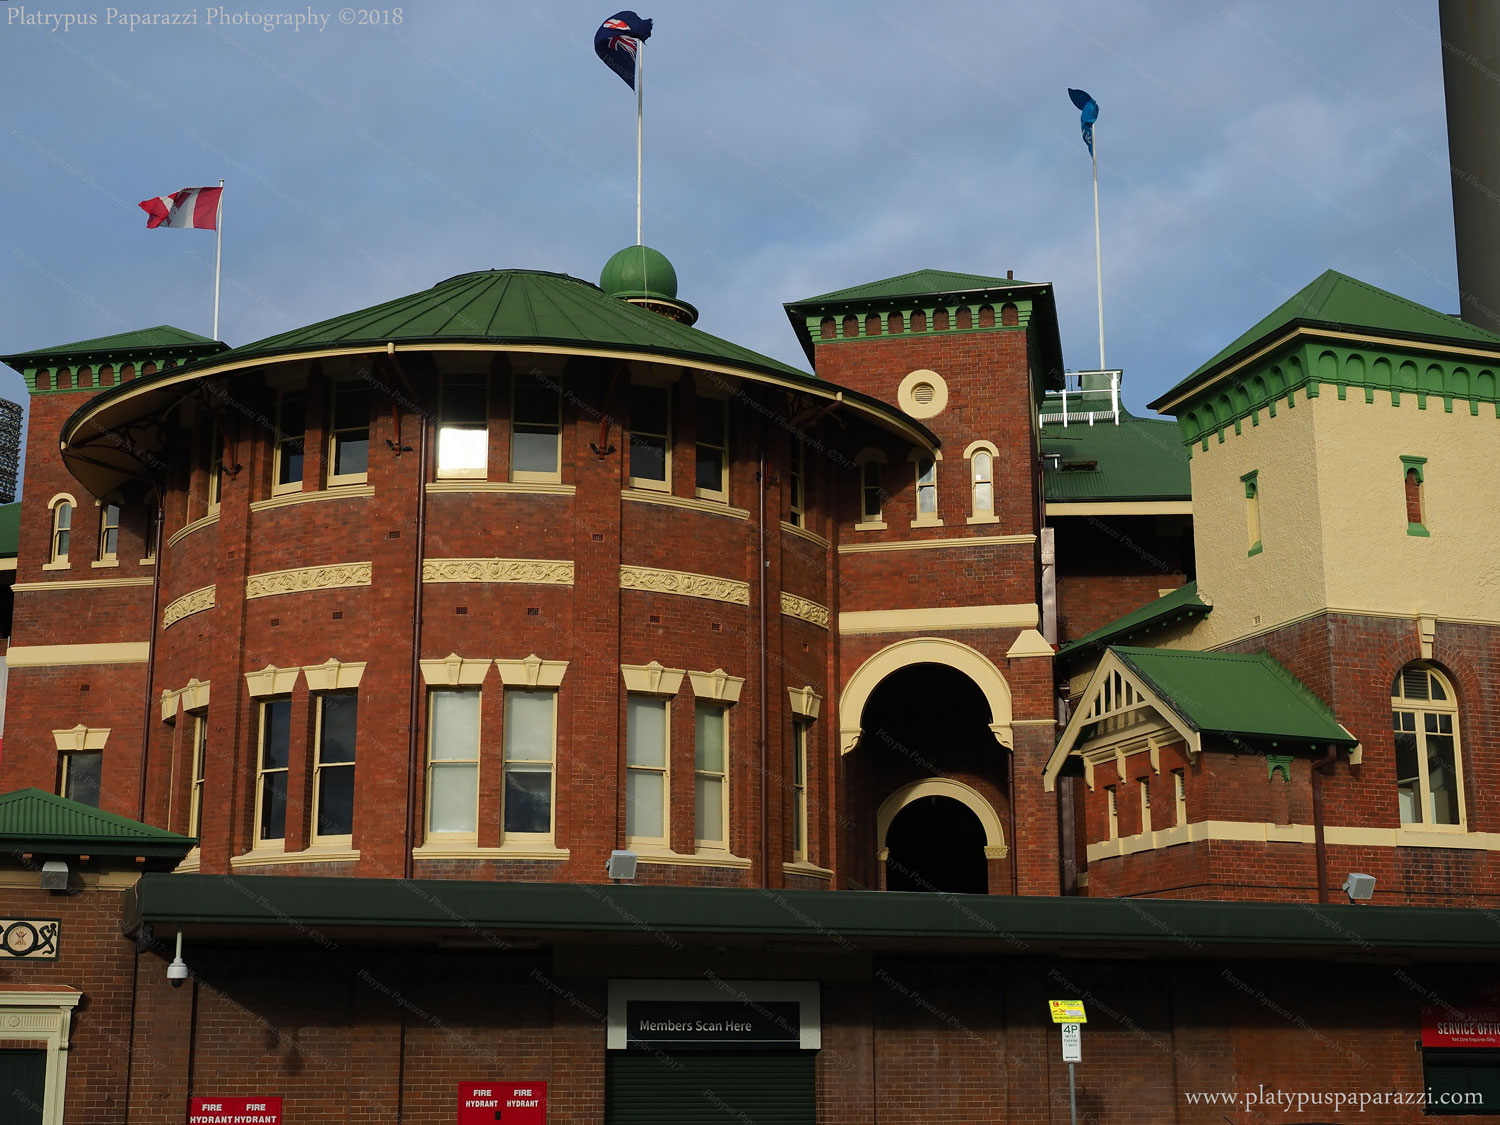
Sydney Cricket Ground Building – August 2018 – Olympus OM-D EM1 MkII, Zuiko Pro 12-40mm. (23mm, F4, 1/1600, ISO200, Aperture Priority)
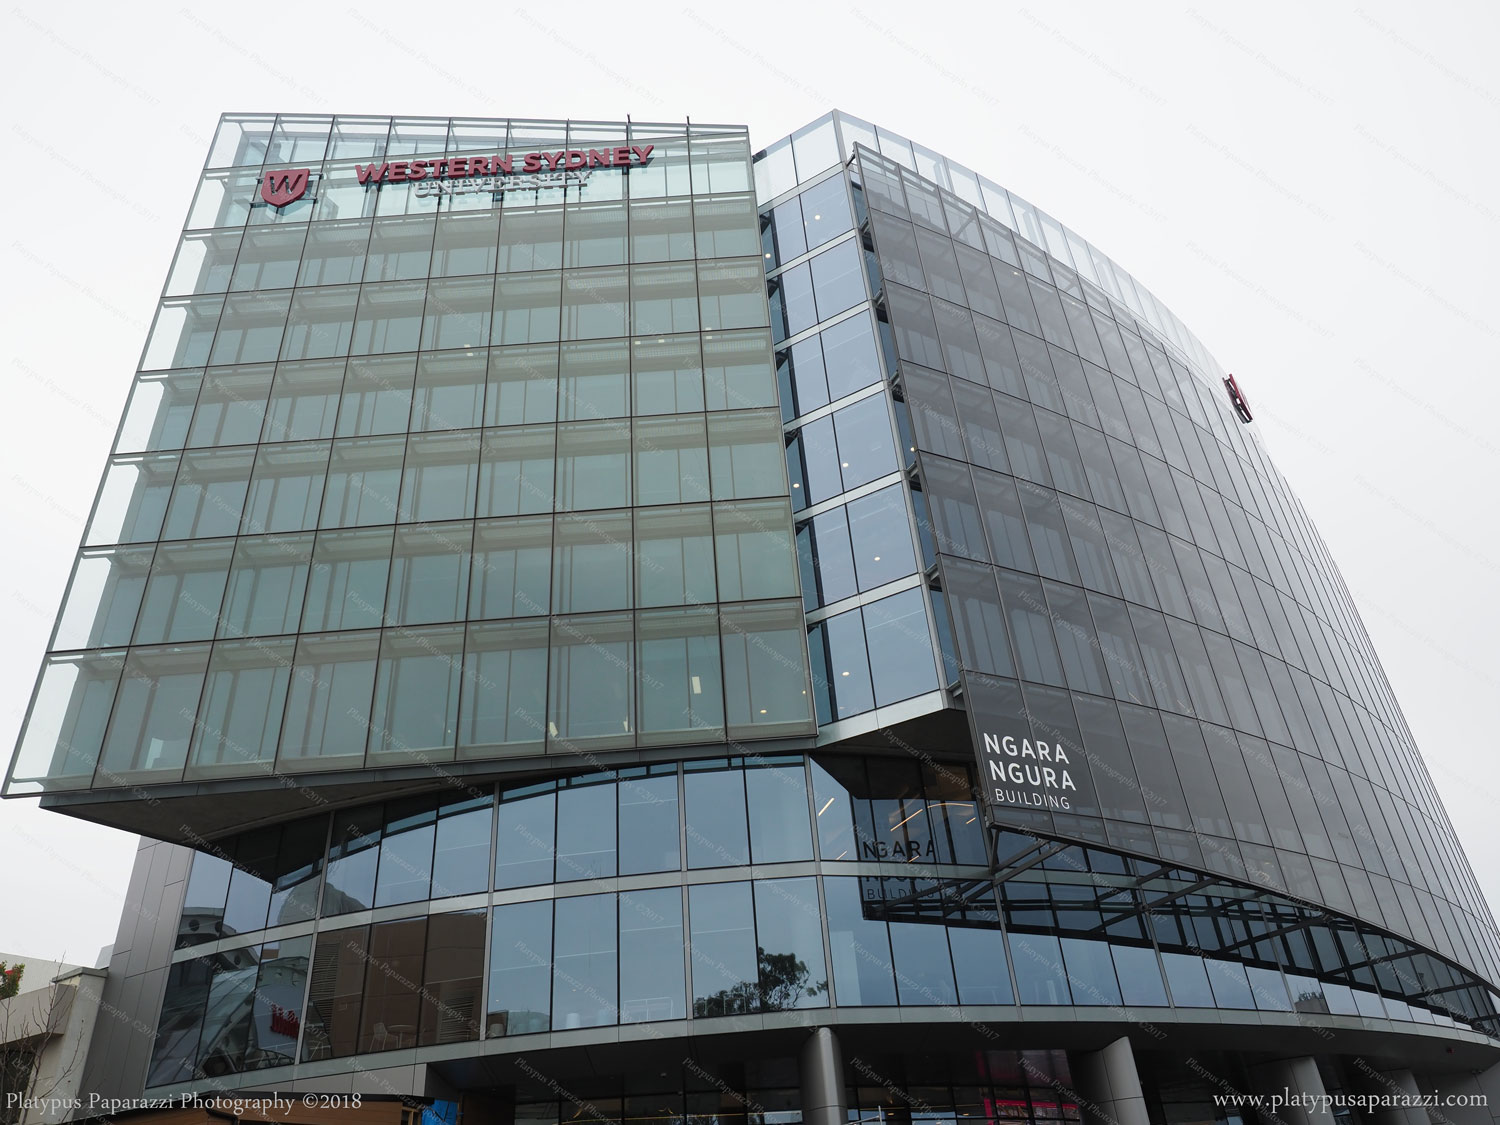
Western Sydney University Building Liverpool, Sydney -NSW – August 2018 – Olympus OM-D EM1 MkII, Zuiko Pro 12-40mm – This image is straight off the camera with standard default JPEG settings and no cropping. (12mm, ISO 200, F4, 1/500th sec, Aperture Priority)
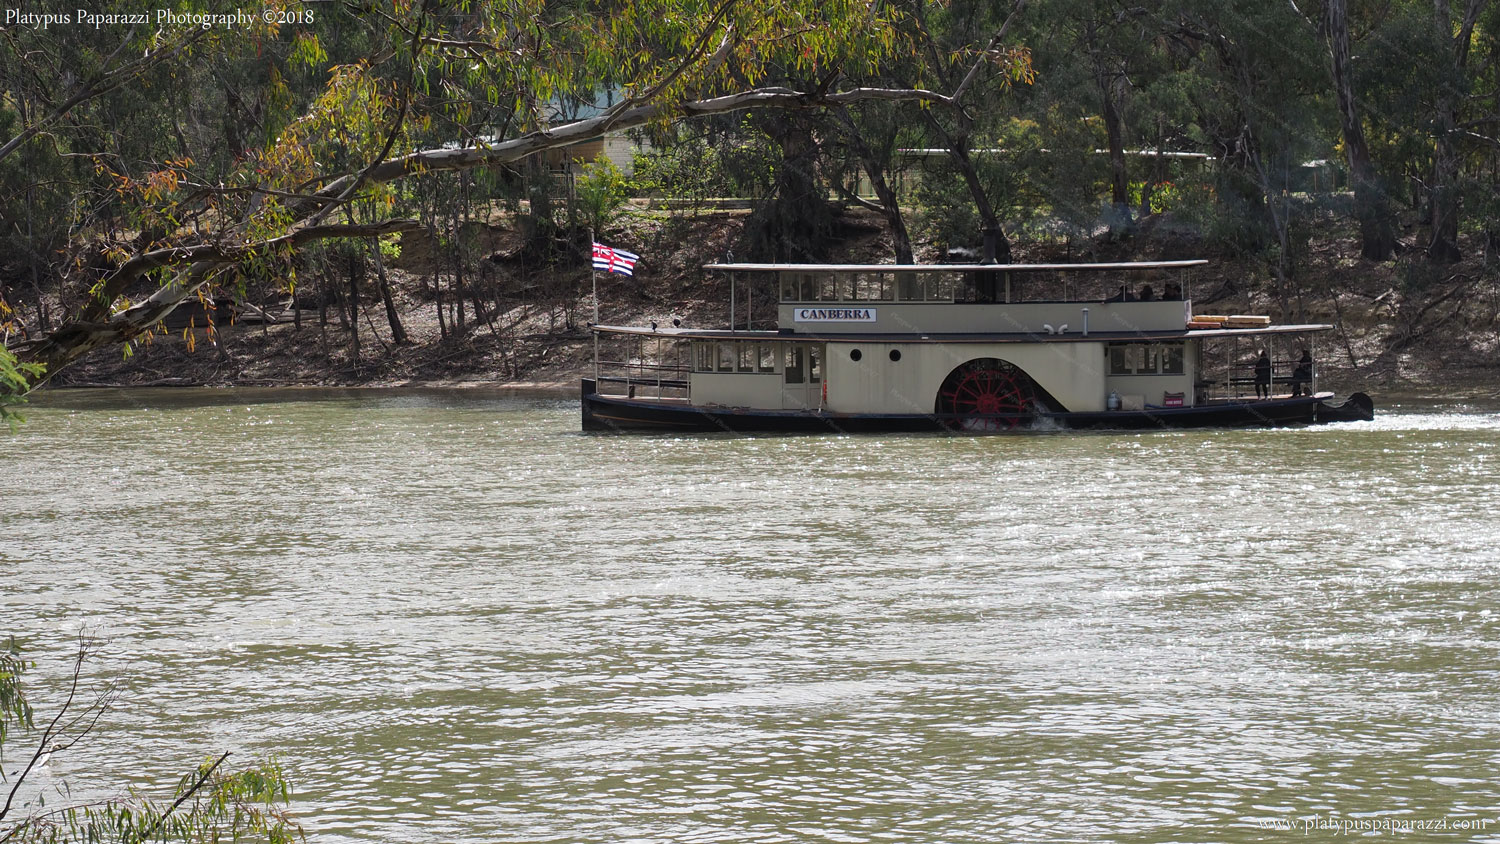
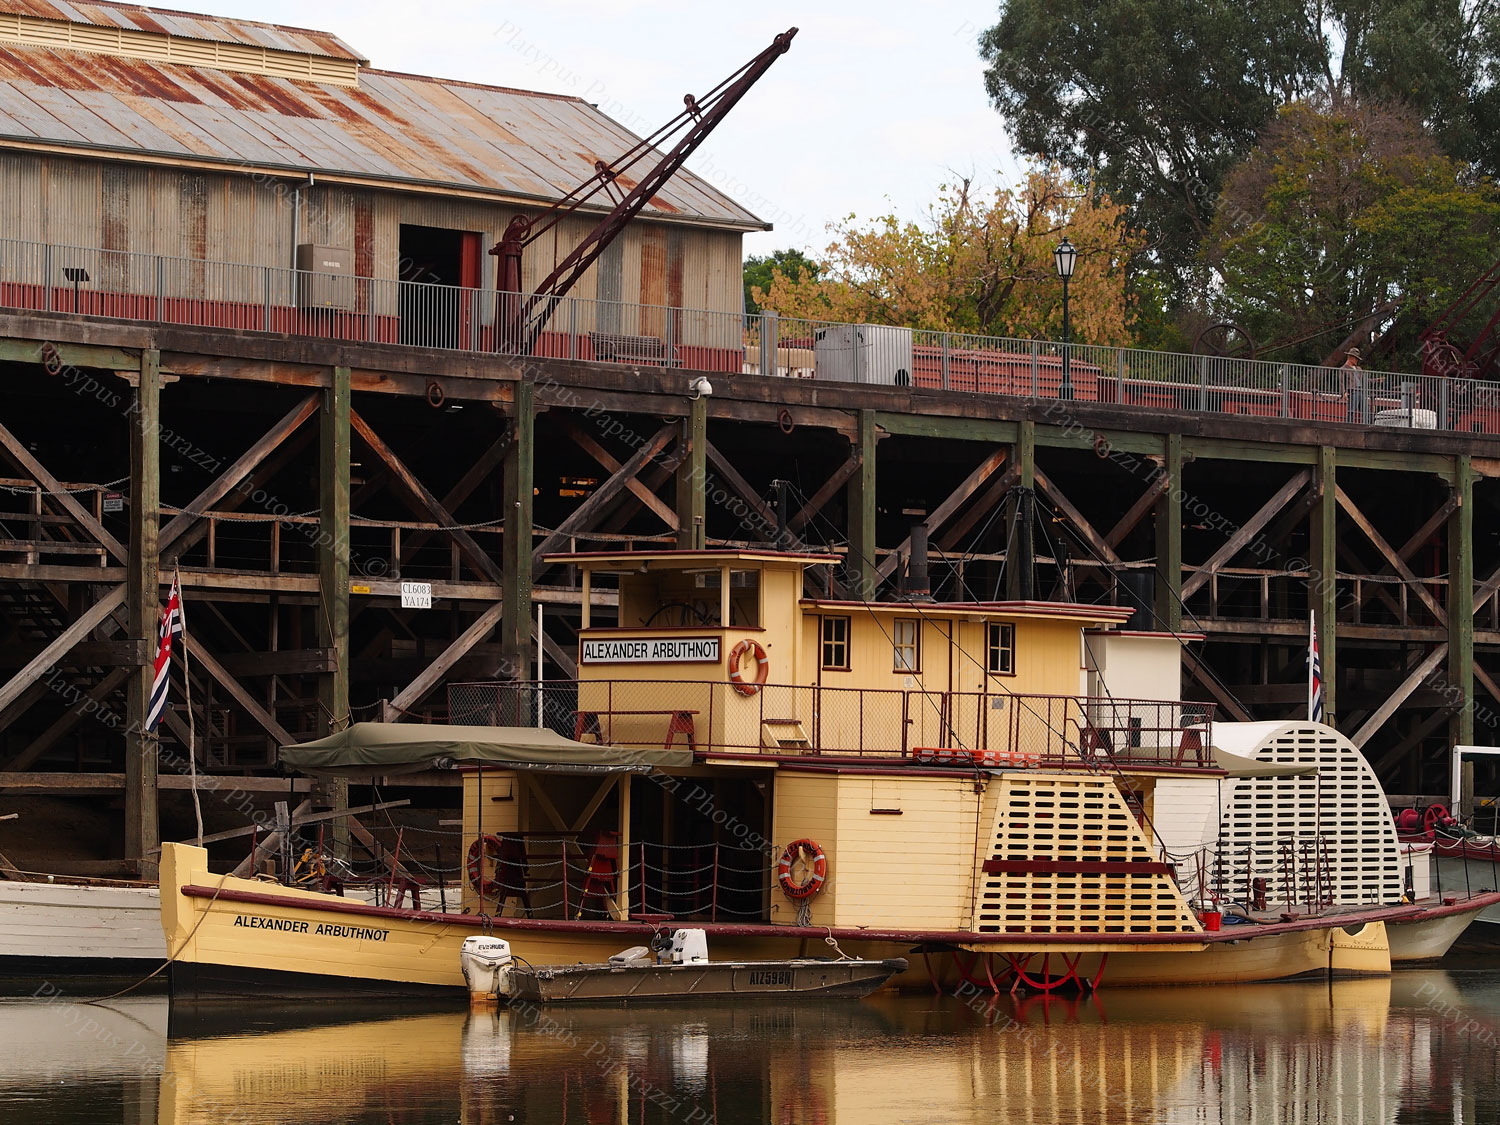
Paddle Steamer – Murray River – Echuca – Victoria – September 2018 – Olympus OM-D EM1 MkII, Zuiko Pro 12-40mm – This image is straight off the camera with standard default JPEG settings and is cropped to 16×9 (40mm, ISO 200, F4.5, 1/1000th sec, Shutter Priority)
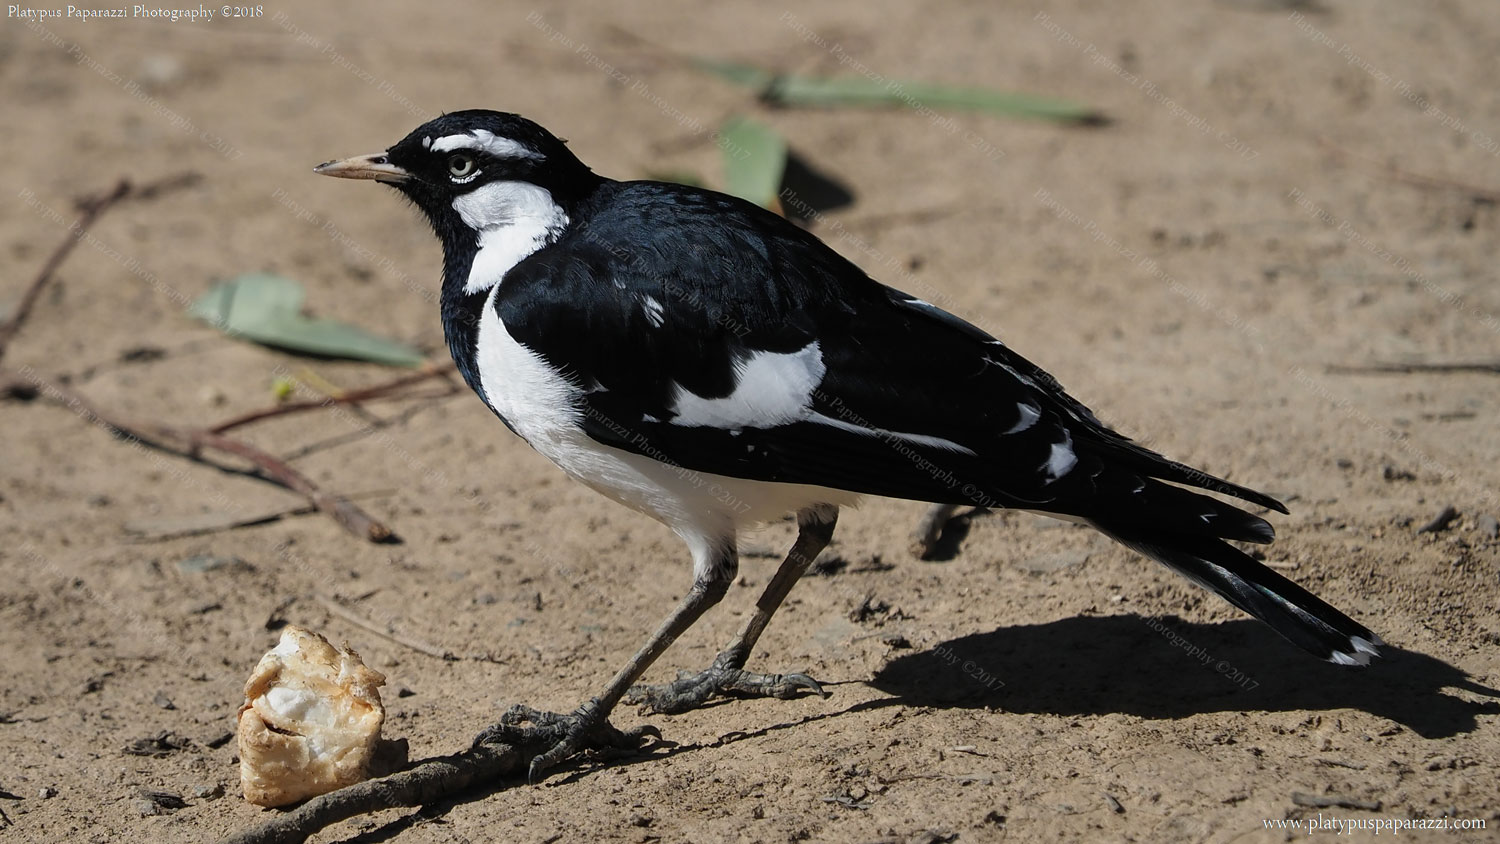
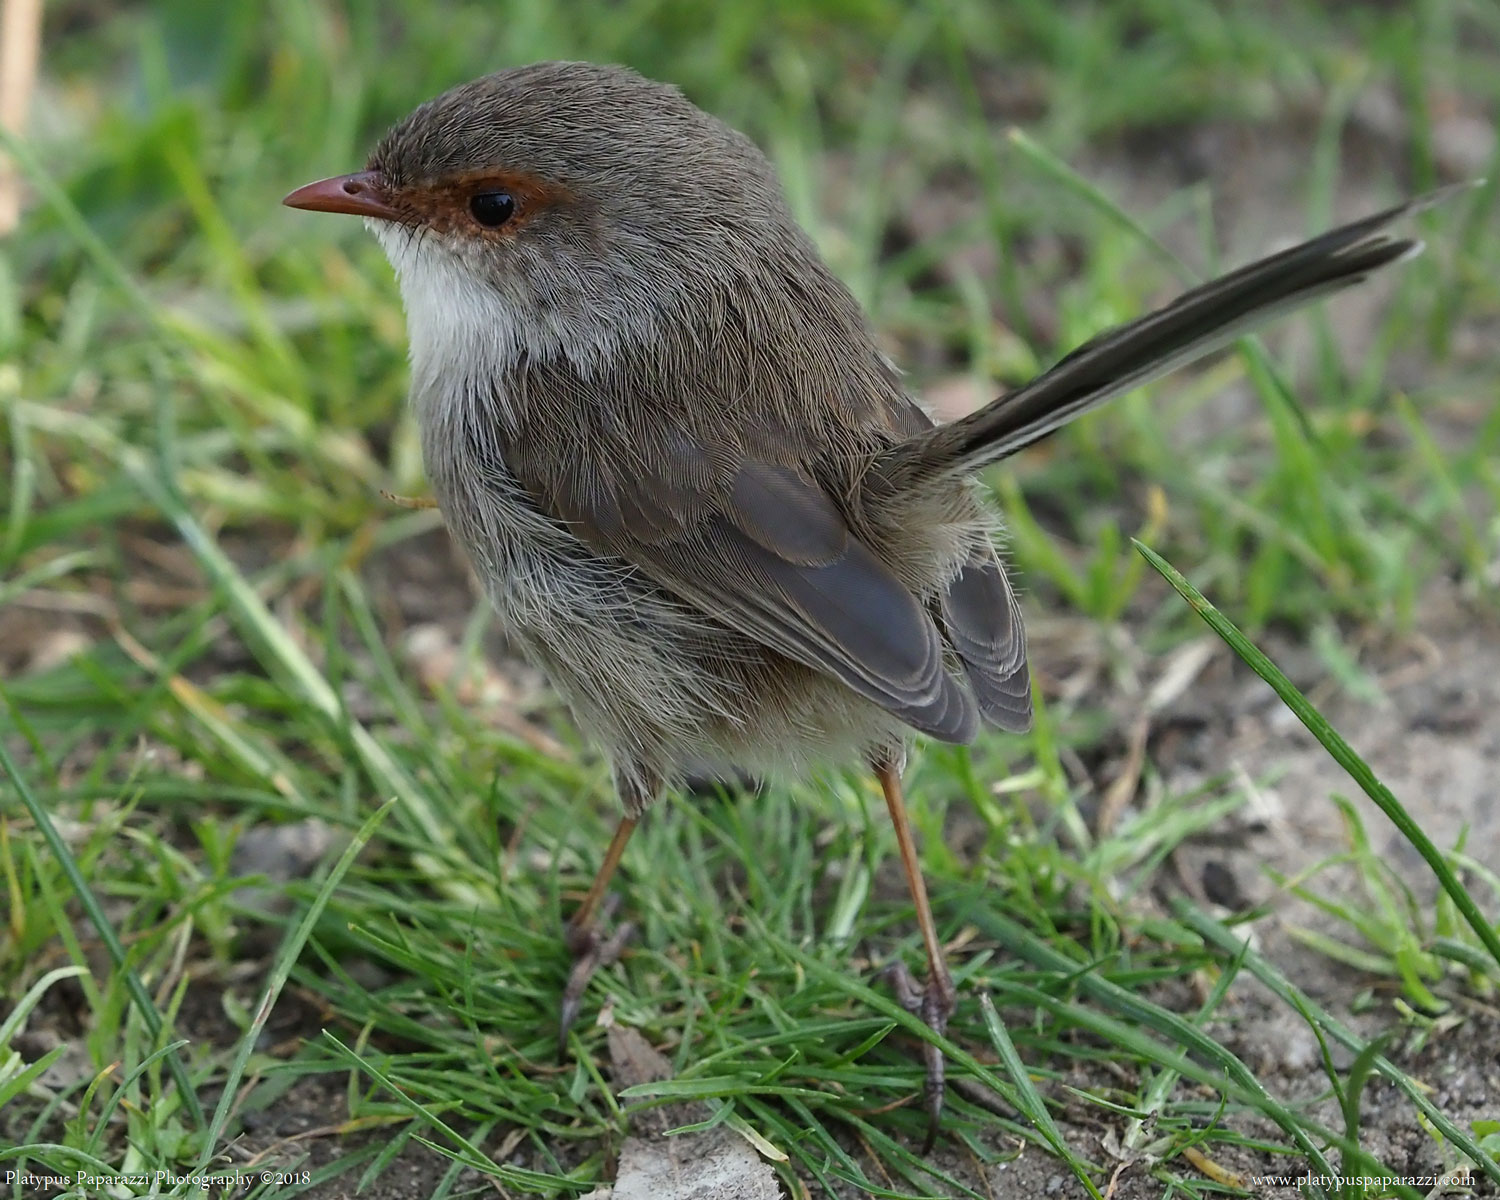
Piwi – Port of Echuca- Victoria – September 2018 – Olympus OM-D EM1 MkII, Zuiko Pro Zoom 40-150mm – This image is edited and cropped to 16:9
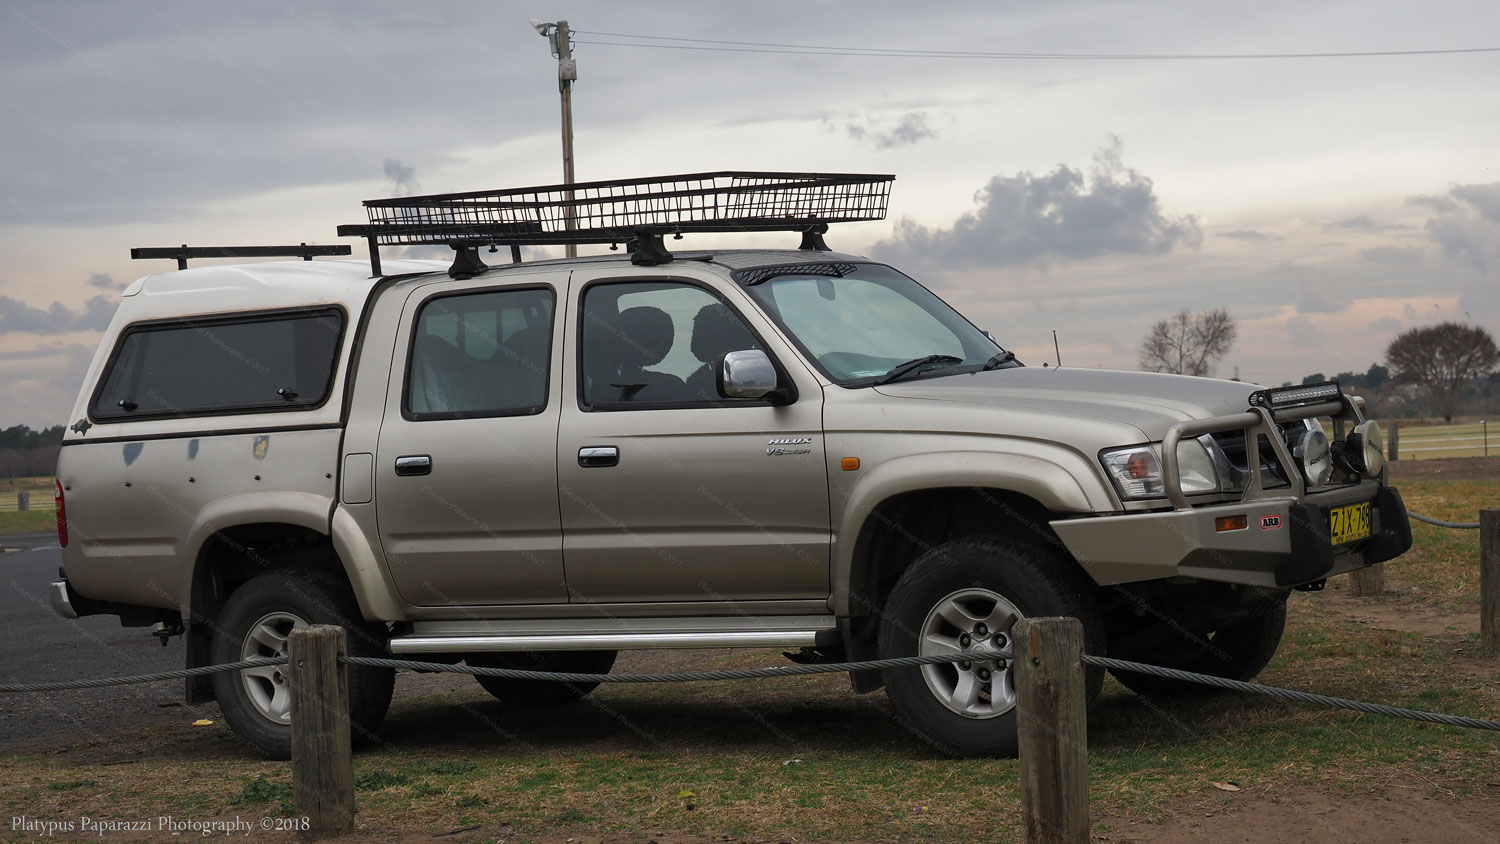
2004 Hilux – August 2018 – Olympus OM-D EM1 MkII, Zuiko Pro 12-40mm. (16×9 Crop plus sharpening).
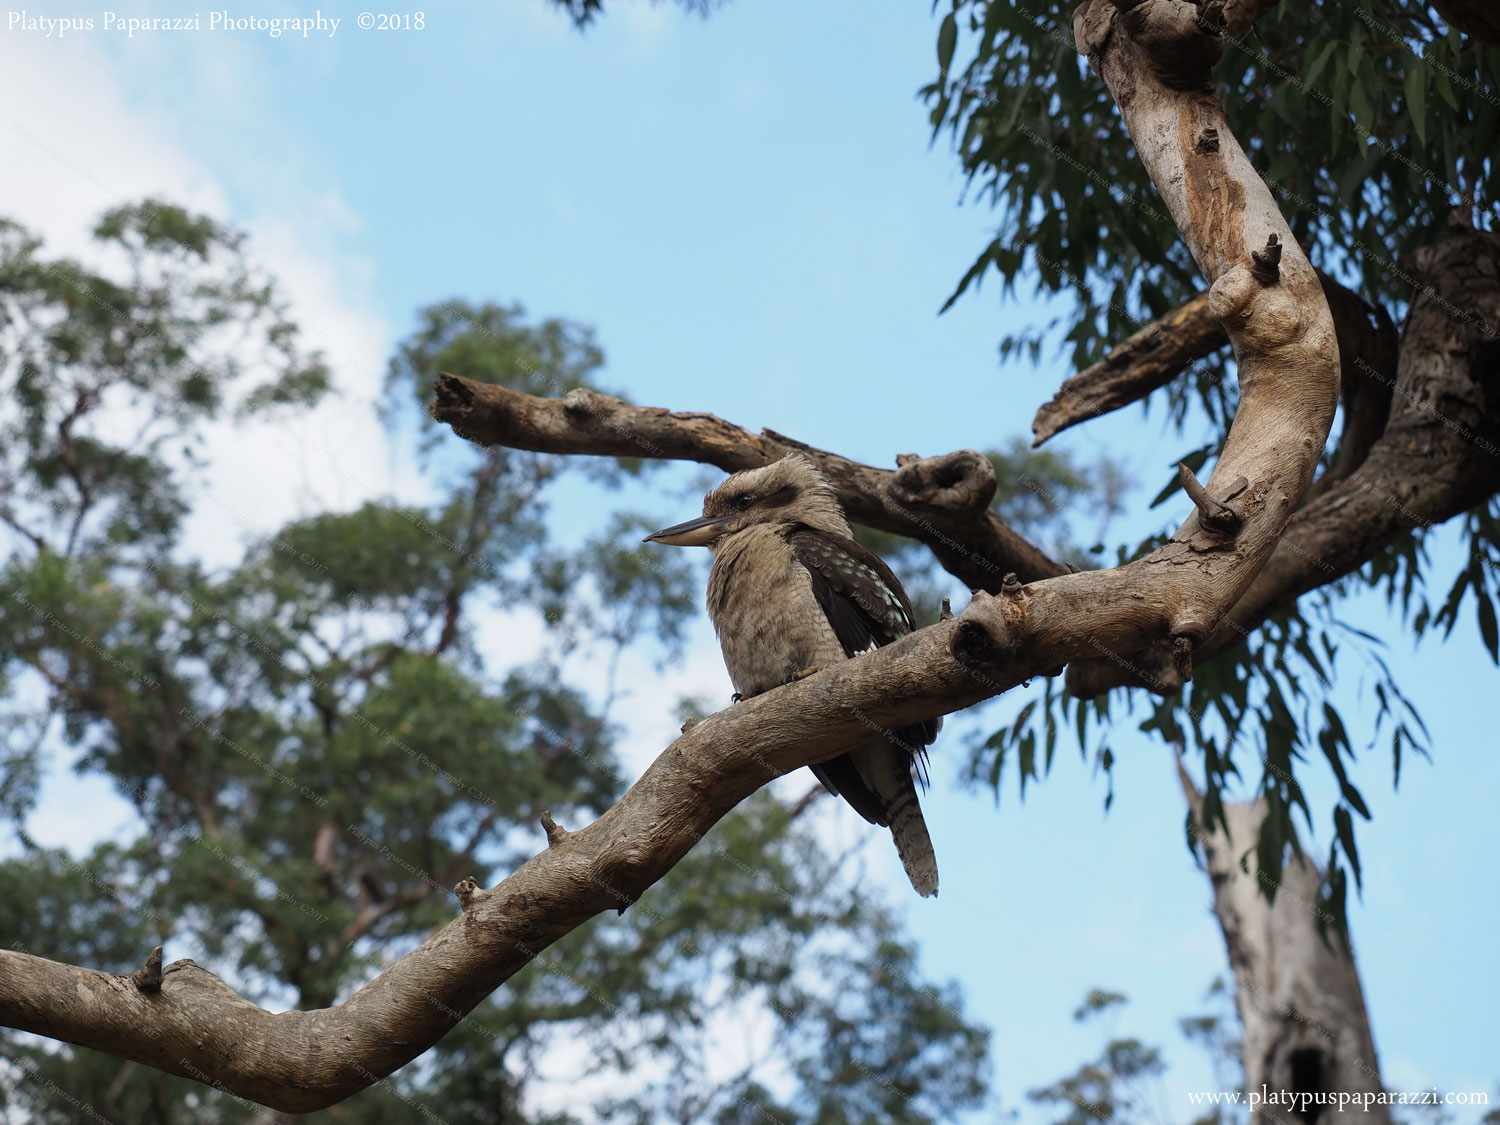
Kookaburra – Royal National Park -NSW – August 2018 – Olympus OM-D EM1 MkII, Zuiko Pro 12-40mm – This image is straight off the camera with standard default JPEG settings and no cropping. (40mm, F4, 1/500, Aperture Priority, 200 ISO, +0.3EV)
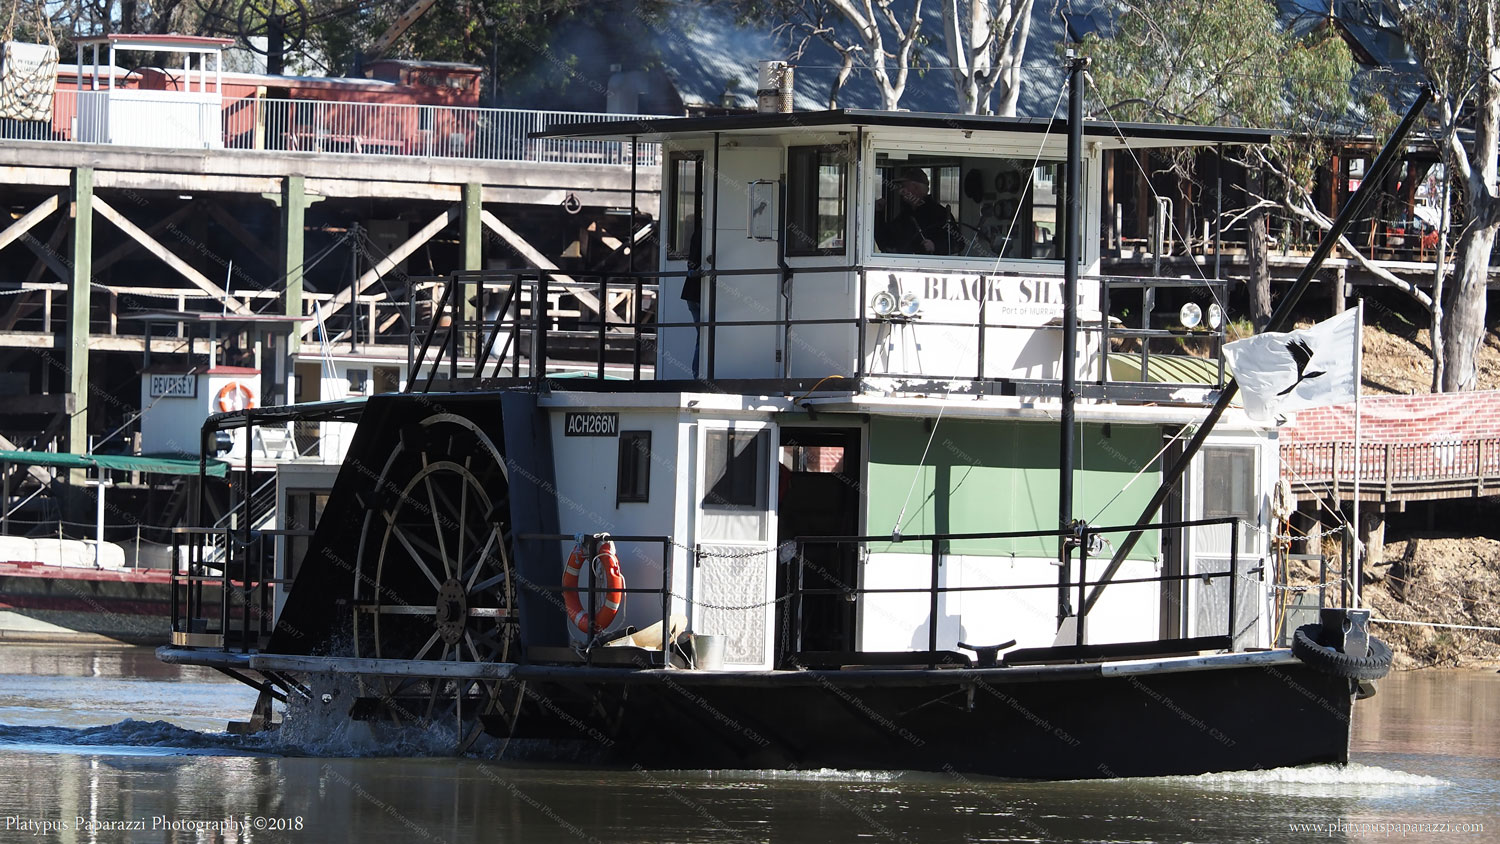
Paddle Steamer – Port of Echuca- Victoria – September 2018 – Olympus OM-D EM1 MkII, Zuiko Pro Zoom 40-150mm – This image is edited and cropped to 16:9

Sunken Hulk – Port of Echuca- Victoria – September 2018 – Olympus OM-D EM1 MkII, Zuiko Pro Zoom 40-150mm – This image is edited and cropped to 16:9

Wild Duck – Preening – Echuca – Victoria – September 2018 – Olympus OM-D EM1 MkII, Zuiko Pro 40-150mm – This image is edited but not cropped.